Adding and Dropping Classes Using SOLAR
How to Add a Class
1. Log into SOLAR.
2. Click on the Student Center tile located on the Student Homepage.

3. From the Student Center Academics section, click on Add a Class.

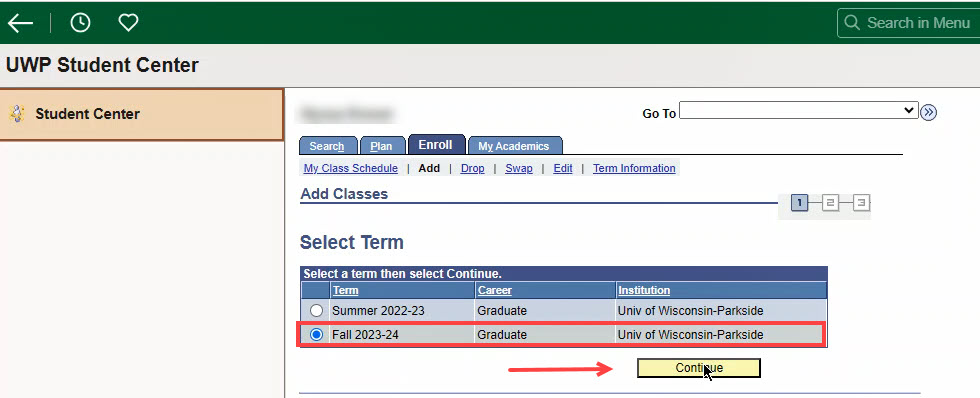
4. Select the preferred Term and then click to Continue.
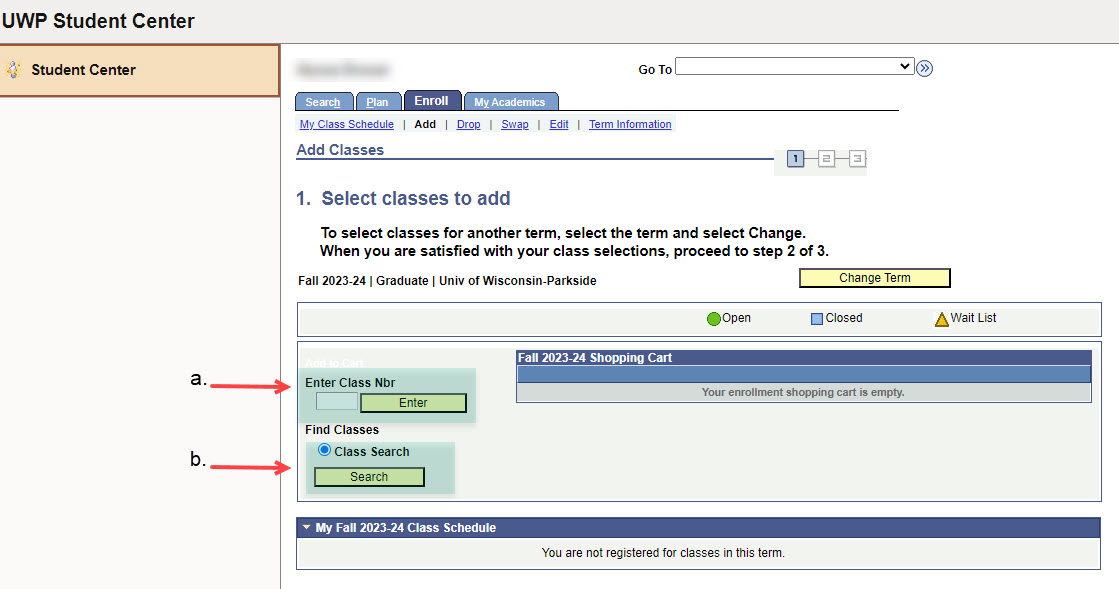
5. This will bring you to the Enroll tab, where you'll have the option to search by (a) course number or (b) subject.
Enter a course number and/or click on the Search button.
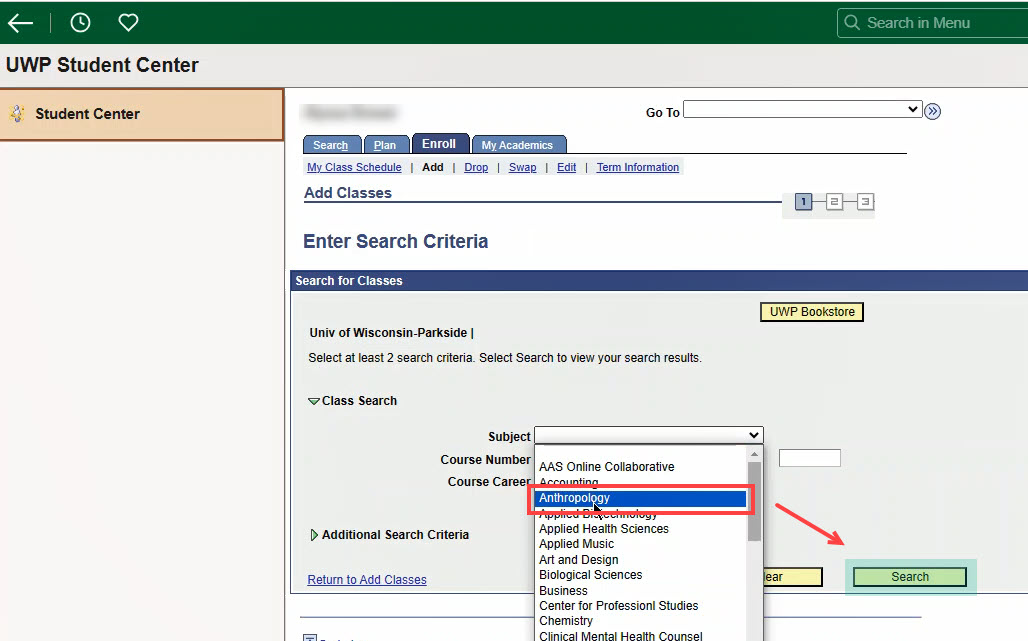
6. Enter your preferred search criteria, and then click on the Search button.
7. Locate the class you wish to take and then click on the "Select Class" button next to the class status.
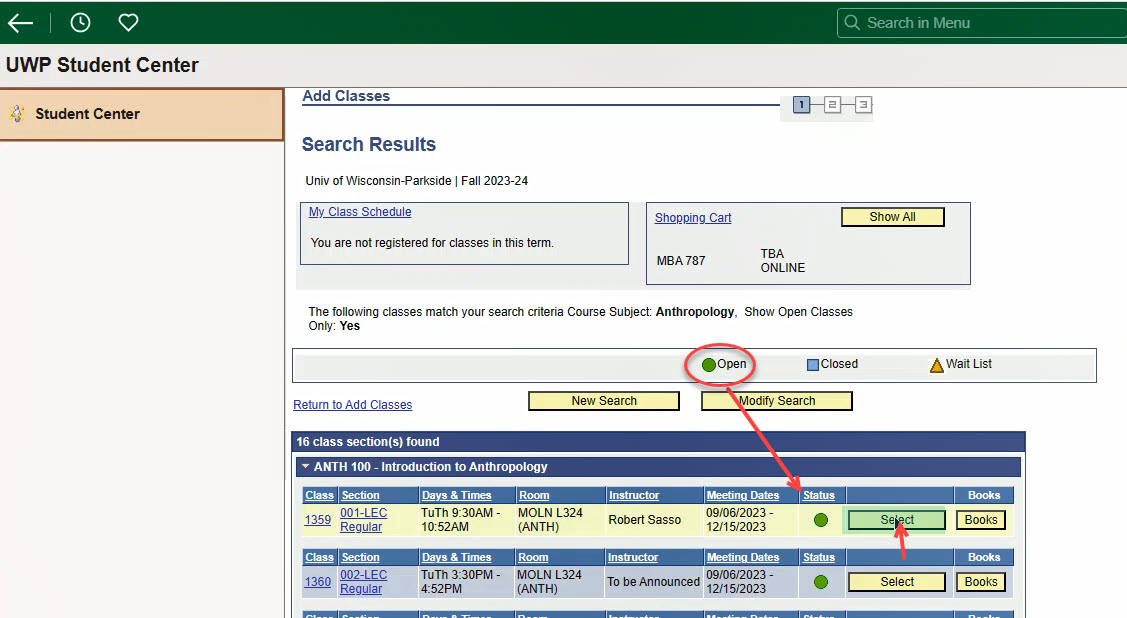
[Note: You'll know a class is open when a green circle appears in the Status column.]
8. On the "Select classes to add - Enrollment Preferences" screen, you can view the class details. When you're ready to add the class to your Shopping Cart, click on the Next button.
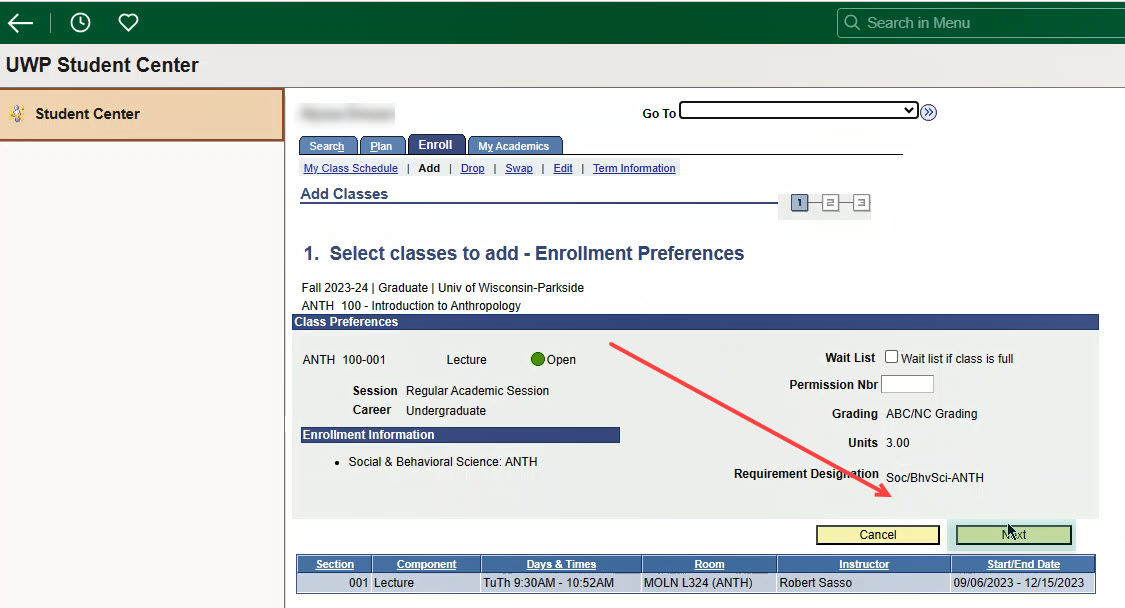
[Repeat this process for all classes you wish to enroll in.]
9. Once you've finished adding classes to your Shopping Cart, click on the Proceed to Step 2 of 3 button.
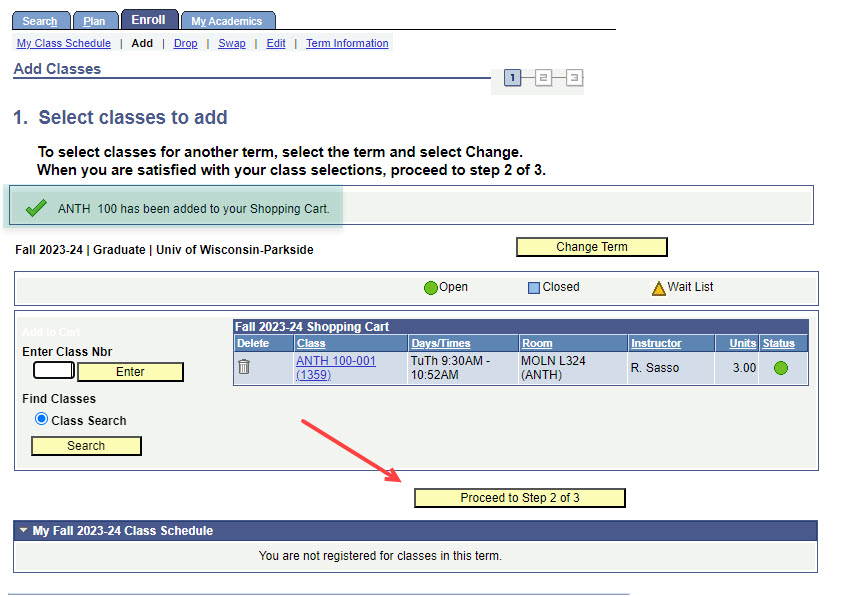
Proceed through the next steps to complete your semester enrollment.
How to Drop a Class
- Log into SOLAR.
- Click on the Student Center tile located on the Student Homepage.

- From the Student Center Academics section, click on Add a Class.

- From the Enroll tab, click on Drop > Select the class you wish to drop and then select "drop selected classes".
